Perun moto KTM 1290/1390 (2021+) Billet top rack - Installation Instructions
Content of the hardware kit
- 1 x 1290 Billet top rack,
- 2 x 8 mm spacer,
- 4 x 13 mm spacer,
- 2 x 25 mm spacer,
- 2 x 29 mm spacer,
- 2 x M8x40 countersunk bolt,
- 2 x M8x50 countersunk bolt,
- 2 x M8x60 countersunk bolt.
Rack can be installed with our without stock grab handles. Three combinations are shown below, as well as several other options.
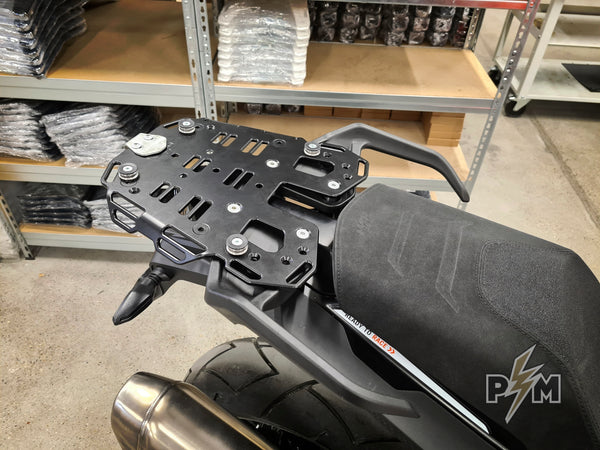
I. 1290 Billet top rack with stock grab handles
II. 1290 Billet top rack without stock grab handles - high position
III. 1290 Billet top rack without stock grab handles - low position
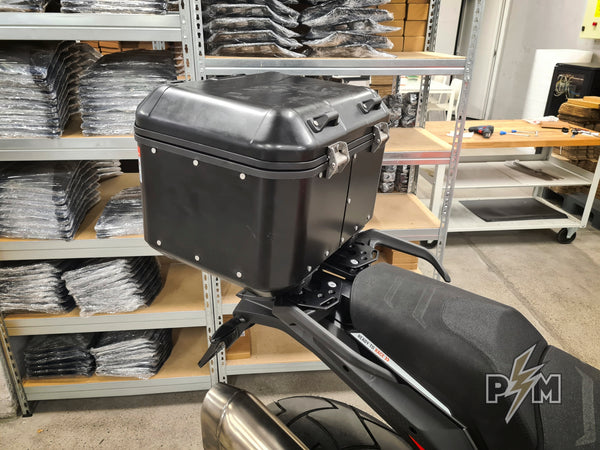
IV. Installation of Givi Monokey top box
V. Installation of SW-Motech top box
VI. Rotopax installation

I. 1290 Billet top rack with stock grab handles
Needed hardware:
- 1 x 1290 Billet top rack,
- 2 x 8 mm spacer,
- 2 x 25 mm spacer,
- 2 x M8x50 countersunk bolt,
- 2 x M8x60 countersunk bolt.
1. Undo four bolts and remove stock luggage rack and grab handles.

2. Place the grab handles on flat surface and insert 25 mm spacers in the front holes and 8 mm spacers in the rear holes.


3. Place Perun moto rack as shown. Align large countersunk holes with spacers below.

4. Make sure plastic cover is positioned well.

5. Hold the grab handles and place an assembly over the bike.

6. Make sure everything is aligned. Tighten all bolts by hand. Than torque to 15 Nm, in alternating pattern.
7. Check the bolts after the first ride and re-tighten if necessary.
II. 1290 Billet top rack without stock grab handles - high position
Installed like this, top surface of the rack will be almost flush with the pillion seat - ideal for Mosko moto Reckless bags or similar large luggage.
Needed hardware:
- 1 x 1290 Billet top rack,
- 2 x 8 mm spacer,
- 2 x 25 mm spacer,
- 4 x 13 mm spacer,
- 2 x M8x50 countersunk bolt,
- 2 x M8x60 countersunk bolt.
1. Undo four bolts and remove stock luggage rack and grab handles.
2. Make sure plastic cover is positioned well.
3. Place 13 mm spacers above the threaded holes, as shown.

4. Place 25 mm spacers on top of front 13 mm spacers and place 8 mm spacers on top of rear 13 mm spacers, as shown.

5. Carefully place Perun moto rack as shown and hold by hand. Align large countersunk holes with spacers below.

6. Make sure everything is aligned. Tighten all bolts by hand. Than torque to 15 Nm, in alternating pattern.

7. Check the bolts after the first ride and re-tighten if necessary.
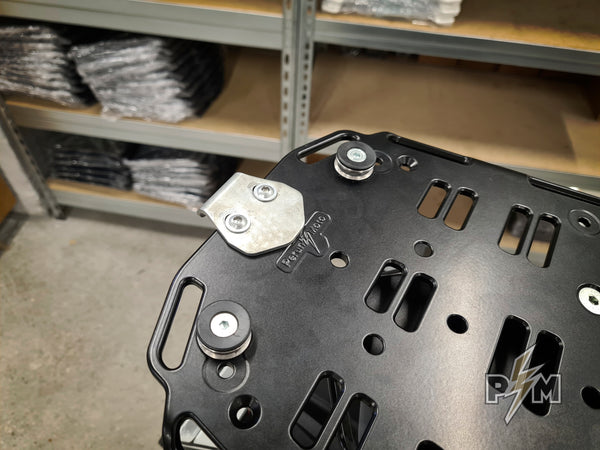
III. 1290 Billet top rack without stock grab handles - low position
Installed like this, rack will sit just above the tail and below the seat line - low profile and elegant, perfect for Kriega US Drypack bags or similar soft luggage.
Needed hardware:
- 1 x 1290 Billet top rack,
- 2 x 13 mm spacer,
- 2 x 29 mm spacer,
- 2 x M8x40 countersunk bolt,
- 2 x M8x50 countersunk bolt.
1. Undo four bolts and remove stock luggage rack and grab handles.
2. Make sure plastic cover is positioned well.
3. Place 29 mm spacers above front threaded holes and 13 mm spacers above rear threaded holes, as shown.

4. Carefully place Perun moto rack as shown and hold by hand. Align large countersunk holes with spacers below.
6. Make sure everything is aligned. Tighten all bolts by hand. Than torque to 15 Nm, in alternating pattern.

7. Check the bolts after the first ride and re-tighten if necessary.
IV. Installation of Givi Monokey top box
Note regarding top cases - if you plan on using larger top cases (40+ liters) or if you plan on putting more then few kilograms in them, we suggest using these 2021+ KTM 1290/1390 Top case supports
Additional hardware needed.
Purchased at Givi/Kappa dealer:
1) Z124 - pyramid shaped part,
2) Z125 - mushroom shaped metal parts,
3) Z2710 - rubber grommets, approx 5 mm thick.
Purchased at the hardware store:
1) 2 x M6 x 25 countersunk bolt,
2) 2 x M6 x 16 button head bolt,
3) 6 x M6 small washer,
4) 2 x M6 safety nut.

Almost all aforementioned hardware is sold by SW-Motech too, as a kit - HERE.
Also, all aforementioned hardware, except Z2710 grommets, are sold by Givi as a kit - Givi Z2309R.
Installation.
Remove the rack from the bike.
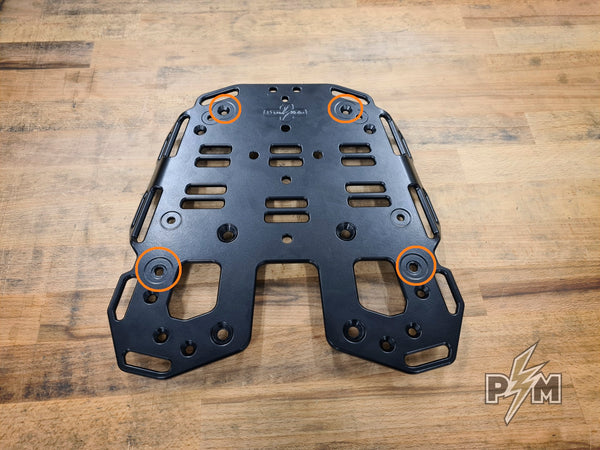
1. Note shallow circular pockets, marked with orange.

2. Inside larger shallow circular pocket, there is a small shallow circular pocket.

3. Position the small M6 washer inside the small shallow circular pocket, as shown.
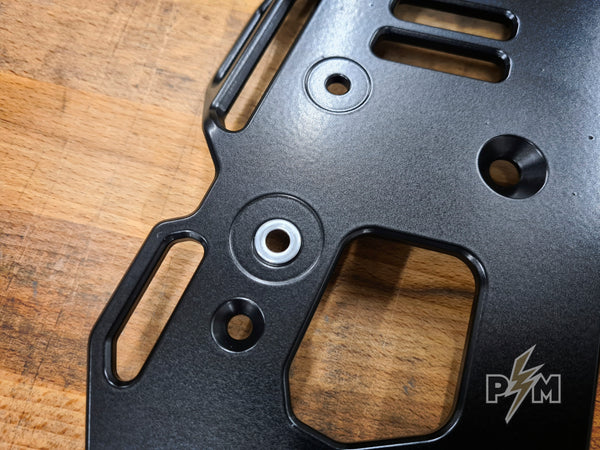
4. Put mushroom shaped part on top of the washer and insert the M6x25 countersunk bolt from above.

5. From the underside, use M6 small washer and M6 safety nut.


6. Make sure that washer on the top side is still sitting in the shallow pocket and tighten everything.
7. Put pyramid shaped part over the marked holes. Position it so cavity is facing forward.


8. Insert one M6x20 button head bolt from the underside. Use small M6 washer. Tighten lightly.

9. Looking through the hole, center the part so threaded holes are centered in the middle of the slot, as shown on the photo above. Than insert another M6x20 button head bolt and small M6 washer and tighten everything.

10. Insert rubber grommets as shown below.


11. Put the rack on the bike, following instructions from chapters I, II or III.

12. Install the top case and check if it fits nicely. Nothing should rattle.
V. Installation of SW-Motech top box
Note regarding top cases - if you plan on using larger top cases (40+ liters) or if you plan on putting more then few kilograms in them, we suggest using these 2021+ KTM 1290/1390 Top case supports
Additional hardware needed.
Purchased at SW-Motech dealer:
1) SW-Motech Adapter kit for Trax.
Purchased at the hardware store:
1) 2 x M6x22 countersunk bolts,
2) 2 x M6x25 countersunk bolts,
3) 2 x M6x20 button head bolts,
4) 8 x M6 washer small.

Installation.
Remove the rack from the bike.
1. Note the large circular pockets, marked with orange.
2. Insert SW-Motech parts as shown below, in the pockets. Important - use M6x22 bolts for front holes and M6x25 bolts for rear holes. Use small M6 washers and safety nuts on the underside. Tighten. Do not overtighten, that would deform the plastic caps.


3. Install SW-Motech metal flange as shown. Use M6x20 button head bolts with washers on both sides. Use M6 safety nuts on the underside. Important - tighten lightly, not fully.

4. Put the rack on the bike, following instructions from chapters I, II or III.
5. Install the top case and engage the latch. Close the latch and metal tab will self-align.


6. Remove the top case and tighten the bolts holding the rear metal flange.
7. Install the top case and check if it fits nicely. Nothing should rattle. Note that top case will make light contact with the stock grab handles, it is intentional. If this bothers you, you can raise the top rack by inserting large M8 washers between spacers and top rack (no need to use longer bolts, plenty of thread engagement will be left).

VI. Rotopax installation
Remove the rack from the bike.
1. Rotopax mount is needed. Either Standard, DLX or Lox will work.
Additionally, two M8x20 countersunk bolts or M8x20 button head bolts are needed (explained later). Check the threads on your Rotopax mount, if threads are imperial, use appropriate bolts.
2. Remove the sheet metal part from the Rotopax mount. Only billet part of the mount is needed.


3. Rotopax can be mounted in three positions.
For green or orange position, use M8x20 button head bolts and large washers.
For blue position, use M8x20 countersunk washers.


4. Tighten the bolts.
5. Put the rack on the bike, following instructions from chapters I, II or III.
6. Install the Rotopax can.
